Loading…
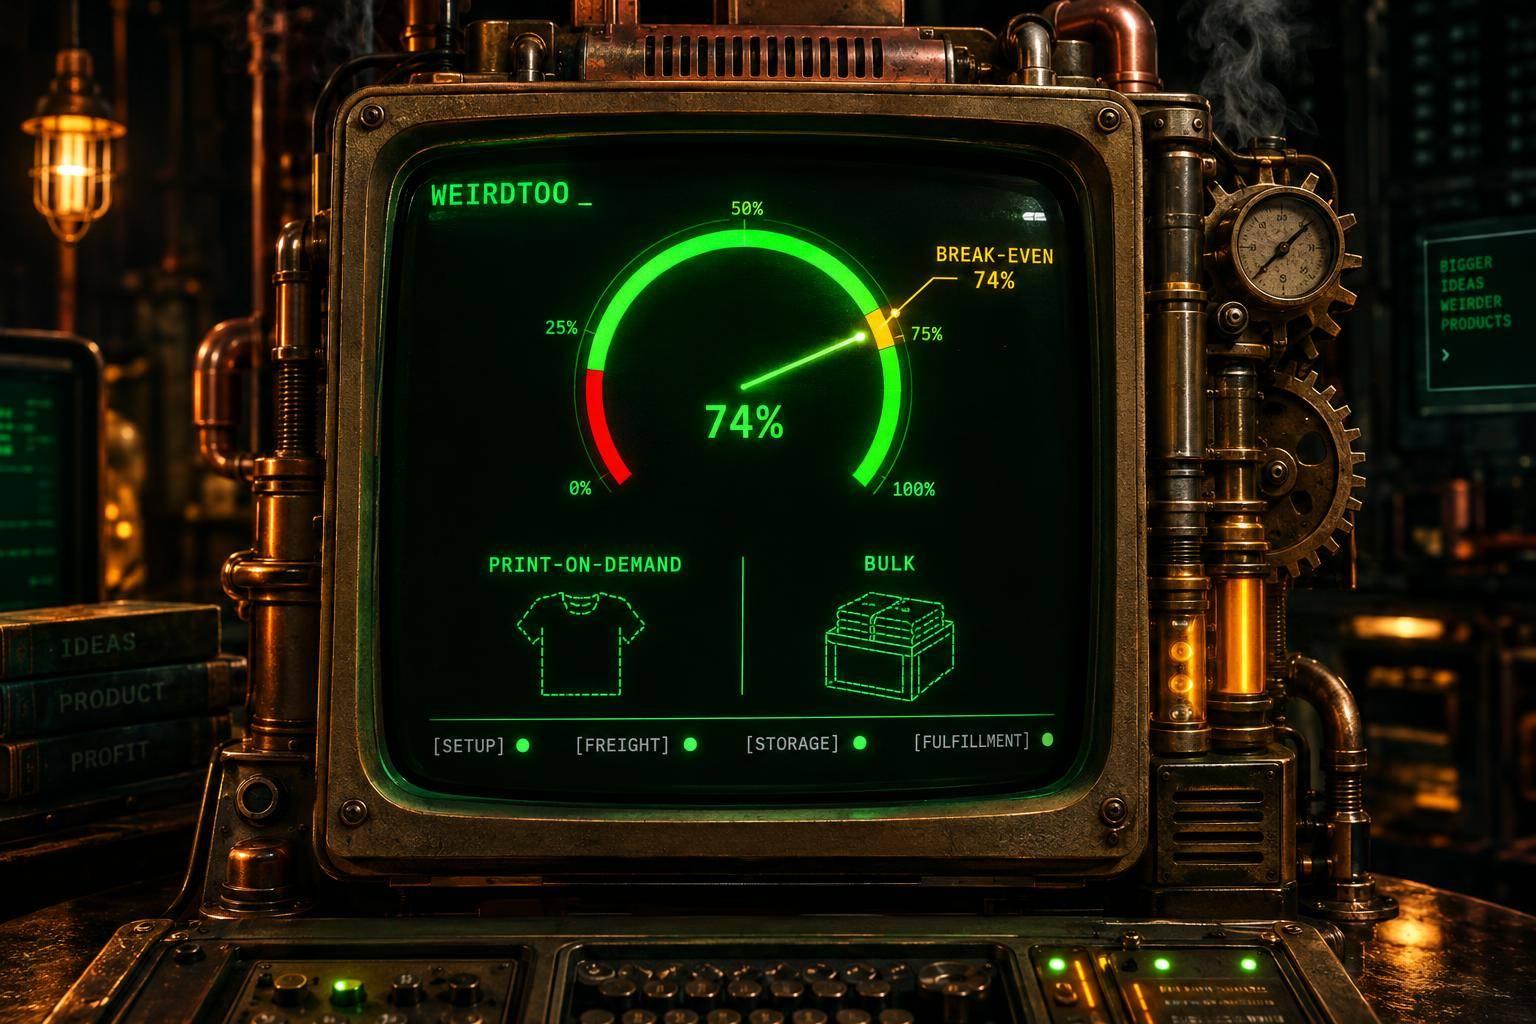
Print-on-Demand vs Bulk Printing: The Real Break-Even
By weirdtoo·November 16, 2026·9 min read
Bulk printing only gets cheaper once enough shirts sell to cover setup, freight, storage, and packing. In a hypothetical 100-shirt run, that's 74 sales.
Print-on-Demand vs Bulk Printing: The Real Break-Even
Bulk printing wins only when enough shirts sell to cover the whole run - not just the print bill. In the hypothetical 100-shirt example below, bulk first beats print-on-demand (POD) at 74 sales, or 74% sell-through. That threshold depends on the quotes, shipping costs, and storage period. It isn’t a universal cutoff, and it isn’t the same as older rules of thumb about a few hundred units over several months. Run the math on your own quotes.
Before choosing, match product quality, add every cost, and divide by units sold - not units printed. Then check demand by size and color, upfront cash, and who will pack the orders. Unsold shirts do not ship themselves.
Quick Comparison
| Factor | POD | Small batches / preorders | Bulk printing |
|---|---|---|---|
| Best fit | Untested designs | Testing paid demand | Proven sellers |
| Cash commitment | Pay per order | Fund a smaller run; preorders can help | Pay for the run upfront |
| Cost per sale | Higher production cost | Depends on the batch quote | Lower only with enough sales |
| Storage and packing | Usually supplier-handled | Arrange both | Arrange both or pay a provider |
| Leftover risk | No speculative stock | Limited to the batch | Unsold sizes and colors tie up cash |
| Design changes | Update future orders | Printed stock stays unchanged | Printed stock stays unchanged |
Use POD to test demand, get separate quotes for smaller runs, and move proven designs to bulk only when the savings cover the stock risk and extra work.
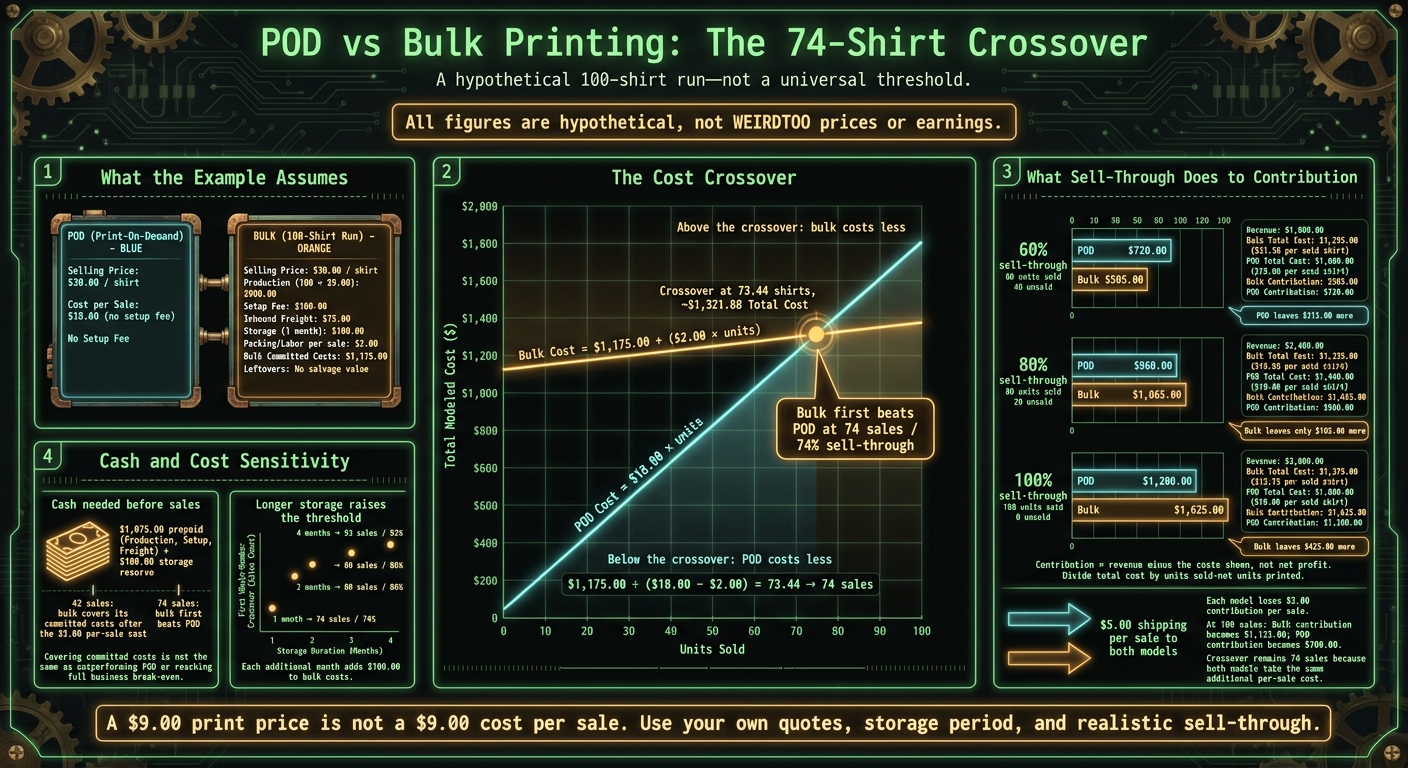
Hypothetical example: where bulk beats POD in a 100-shirt run (74 sales)
1. Where Weird Too Company Fits: Print-on-Demand, Not a Print Shop
Before the math, here’s where we stand. Weird Too Company is print-on-demand. We work through a print-on-demand partner, so a shirt gets printed after someone orders it, and the print provider handles the printing and shipping. We don’t run a screen-print shop, and stocking boxes of inventory isn’t our normal way of working. Our OddDrip store at weirdtoocompany.com/store isn’t open yet. When it opens, that’s how it’ll run.
Bulk printing is the other road. You pay for the whole run up front, then store it, pack it, and ship it yourself, or pay someone to do it. For a design that’s already proven, that can cost less per shirt. For a design nobody has bought yet, it’s a box of guesses.
So which one costs less? It comes down to how many shirts actually sell. The rest of this post walks through the math so you can run it on your own quotes. The numbers in the example are hypothetical. They aren’t our prices.
sbb-itb-342b8b2
2. Calculate Cost per Sale and the Bulk Crossover
Compare both models using the same selling price, sales period, and shipping policy. Divide total cost by units sold - not units printed. Unsold shirts still tie up cash, no matter how low the quoted unit cost looks. [1][4] With matched quotes, calculate the sales volume at which one method becomes more profitable.
Count Production, Shipping, and Inventory Costs
Count production costs: blanks, printing, setup, and any artist payout you actually owe on each sale. (Weird Too Company’s artist payouts aren’t live yet. We’ll share how they work before they start.) Add inbound freight, duties or taxes, fulfillment labor for picking and packing, customer delivery, storage, and losses from defects. For bulk, include any separate outbound freight to your fulfillment location. Markdowns reduce revenue. Unsold sizes or colors increase the cost of each shirt you actually sell. [1][3][4][5]
Calculate the Cost Crossover
For each model, use Total cost = F + (V × Q). Here, F is fixed or committed costs, V is cost per sold item, and Q is units sold.
For bulk, put production, setup, inbound freight, and storage for the chosen period into F. Put packing, postage, and fees into V. For POD, production usually belongs in V.
Crossover point = (F_bulk − F_POD) ÷ (V_POD − V_bulk)
This calculation assumes costs stay stable within the selected quantity tier. [3][6]
Effective bulk cost per sale = total bulk cost ÷ units sold. With equal revenue, the lower-cost method leaves more margin. If bulk needs markdowns that POD does not, compare total revenue minus total cost for each model instead of relying on the crossover alone. [1][4]
Check Sell-Through, Risk, and Cash Needs
Required sell-through = crossover sales ÷ units produced. Round fractional sales thresholds up. An exact whole-number crossover is a tie; the next sale makes bulk cheaper. If the threshold exceeds the batch size, that run cannot reach it.
Test 60%, 80%, and 100% sell-through. Then check what happens with slower sales, extra storage, and markdowns. Check upfront cash, too: money sitting in boxes of shirts cannot fund another design or ad push. Recalculate at every supplier price break. This crossover identifies the cheaper production method - not your full business break-even. [1][3][5][6] Next, test the math against a 100-shirt run.
3. Hypothetical Example: Printing 100 T-Shirts
All figures are hypothetical. They aren’t Weird Too Company prices or earnings. Each shirt sells for $30.00. POD costs $18.00 per sale, with no setup fee. Bulk means buying 100 shirts at $9.00 each, plus $100.00 for setup, $75.00 for inbound freight, and $100.00 for one month of storage and handling. Packing supplies and labor add $2.00 per sale. Leftovers have no salvage value during this period.
The selling price stays the same. What changes is how many shirts sell - and how much cash stays tied up in the ones that don’t.
Compare 100%, 80%, and 60% Sell-Through
| Metric | 100% sell-through | 80% sell-through | 60% sell-through |
|---|---|---|---|
| Units sold | 100 | 80 | 60 |
| Revenue | $3,000.00 | $2,400.00 | $1,800.00 |
| Bulk total cost | $1,375.00 | $1,335.00 | $1,295.00 |
| Bulk cost per sold shirt | $13.75 | $16.69 | $21.58 |
| POD total cost | $1,800.00 | $1,440.00 | $1,080.00 |
| Bulk contribution | $1,625.00 | $1,065.00 | $505.00 |
| POD contribution | $1,200.00 | $960.00 | $720.00 |
Contribution = revenue minus the costs shown, not net profit.
Find the Sales Threshold and Upfront Cash
Bulk costs $1,175.00 + ($2.00 × units sold). POD costs $18.00 × units sold.
To find where those costs match, calculate $1,175.00 ÷ ($18.00 − $2.00) = 73.44 shirts. You can’t sell 0.44 of a shirt here, so bulk first beats POD at 74 sales, or 74% sell-through[6].
Bulk covers its upfront committed costs at 42 sales, after allowing for the $2.00 per-sale cost. That is a different threshold: covering those costs does not mean bulk has beaten POD.
If production, setup, and freight are prepaid, bulk needs $1,075.00 before any sales, plus a $100.00 storage reserve[6]. At 80 sales, that commitment leaves just $105.00 more contribution than POD. At 60 sales, POD leaves $215.00 more.
Test Free Shipping and Longer Storage
If you cover a flat $5.00 shipping cost per sale in both models, each loses $5.00 in contribution per sale. At 100 sales, bulk contribution falls to $1,125.00, and POD falls to $700.00. The crossover stays at 74 sales because both models take the same hit[6].
Storage changes the comparison. Each additional month adds $100.00 to bulk costs. With two months of storage, bulk needs 80 sales to beat POD. With three months, it needs 86; with four months, 93[3].
4. Choose Based on Demand, Cash, and Workload
Bulk only wins if you can sell the run, pay for inventory, and handle fulfillment. Start with your calculated crossover point. Then check demand, cash, and your capacity to store, pack, and ship orders.
| Factor | Favor POD | Consider a small batch | Consider bulk |
|---|---|---|---|
| Demand confidence | Untested artwork or uncertain sizes | Some paid demand, but little repeat history | Repeat sales for the same design and variants |
| Expected sales | Below your calculated threshold | Enough to test a smaller run with a separate quote | Comfortably above the threshold |
| Available cash | Need to avoid an inventory commitment | Can fund a limited run without delaying other bills | Can fund inventory and regular running costs |
| Leftover tolerance | Cannot absorb unsold stock | Can accept a small, defined loss | Can afford slow sellers and markdowns |
| Fulfillment capacity | Need supplier-managed shipping | Can store and pack a limited run | Have reliable storage, packing, and shipping - or have priced out a 3PL |
If any row looks shaky, stick with POD or test a smaller run first.
Test Demand With POD or Preorders
Use POD for new artwork, broad catalogs, and uncertain size demand. Paid orders and repeat purchases tell you more than likes, followers, or impressions. Track purchases by design, size, and color. Keep one-time traffic spikes separate from steady demand.
Preorders let you test demand by variant. Clearly state the order cutoff, expected shipping dates, and cancellation or refund terms. For a small-batch test, get a separate quote. A smaller run won't have the same costs as a larger one.
Move Proven Sellers to Bulk
Check sell-through by design, size, and color, not just total store sales. Base the order on the sizes your customers buy, rather than a generic size mix.
Before committing, check production and replenishment lead times, storage space, packing labor, and how long your cash will sit in inventory before sales come in. If you need a third-party logistics provider (3PL), include its fees and minimums before approving the run.
A hybrid setup puts proven sellers in bulk while keeping new or slow-moving variants on POD. Even a bestseller can stay on POD if stocking it would strain cash or fulfillment. Use those checks alongside your supplier quotes before placing the order.
5. Conclusion: Run the Numbers on Your Quotes
A lower print price doesn’t mean more profit. Compare sell-through, cash tied up, and fulfillment costs before choosing POD or bulk.[1][4] Apply the break-even math from the examples above to your own quotes.
Complete Your Quote Comparison Worksheet
Record these costs to find the sales volume where bulk becomes more profitable:
- POD: production, fulfillment, packaging, shipping, and payment processing fees.
- Bulk: quantity, unit price, setup costs, inbound freight, storage, packing labor, outbound shipping, and returns processing.
Run low, expected, and high sales scenarios for each size and color.[5] Account for defects, markdowns, and unsold inventory. A box of unsold shirts still costs money.
For each scenario, calculate revenue, all modeled costs, upfront cash, crossover units, and the sell-through rate needed to beat POD.[1][4]
Keep using POD until your forecast clears the break-even threshold. Before moving to bulk, check that the savings cover the extra inventory risk and fulfillment work.
FAQs
How much sales history should I have before ordering bulk?
There’s no universal sales threshold. You need enough sales history to see steady demand, which sizes sell and in what proportions, and what percentage of your last drop sold at full price. A brief sales spike isn’t enough.
Move a design to bulk only when its sales consistently meet your calculated break-even point. Keep new or seasonal designs on print-on-demand while you test demand, before tying up cash in inventory.
How do returns and exchanges affect my break-even point?
Returns and exchanges push your break-even point higher by adding costs and shrinking profit margins [1]. With bulk printing, you pay for the whole batch upfront. If fewer items sell, you’ll need more full-price sales to recover that upfront cost [1].
When comparing bulk printing with print-on-demand, include estimated return costs, processing fees, and shipping in your total landed cost [1][2].
How do I compare costs when print quality differs?
Compare cash cost per sold unit for equivalent finished products - not just print prices. Include the garment, decoration, packaging, and shipping or freight in landed cost. Then divide total landed cost, including unsold bulk inventory, by the number of units sold.
Bulk costs less once sales pass the same crossover used in the main example:
Crossover sales = (F_bulk − F_POD) ÷ (V_POD − V_bulk)
Required sell-through = crossover sales ÷ units produced. Round the sales figure up to a whole shirt.
In the hypothetical 100-shirt example, that’s $1,175.00 ÷ ($18.00 − $2.00) = 73.44, so 74 sales, or 74% sell-through. Don’t divide a bulk unit cost by a POD unit cost and call that sell-through. It’s a different equation, and it gives you a different answer.
Check samples before and after washing. Compare the blanks, prints, weight, feel, and durability.
Current contact path
Need custom apparel or scoped help?
Use the contact form; removed product, checkout, research, and newsletter funnels stay offline.