Loading…
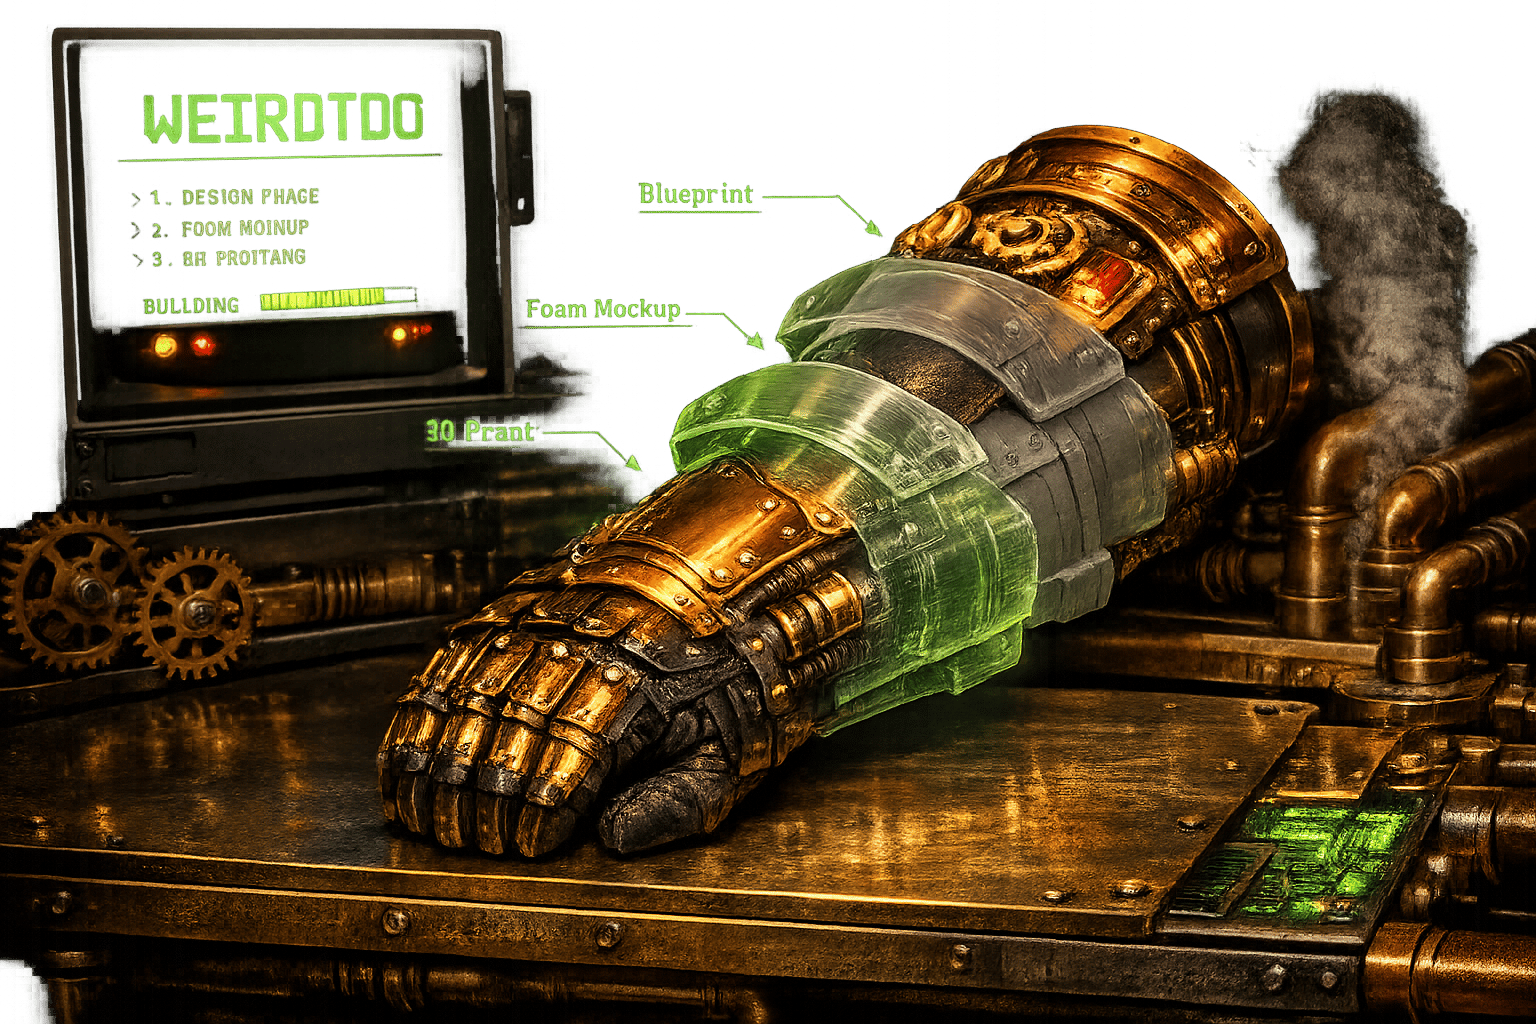
“From Fantasy to Reality: Custom Cosplay Gear”
By weirdtoo·March 9, 2026·12 min read
Step-by-step guide to planning and building custom cosplay gear — choosing materials, tools, mockups, 3D printing, painting, and finishing techniques.
“From Fantasy to Reality: Custom Cosplay Gear”
Cosplay is about transforming fictional characters into wearable art. It’s not just dressing up - it involves planning, crafting, and attention to detail. This guide breaks down the process into clear steps, from choosing materials like EVA foam and thermoplastics to mastering tools like heat guns and sewing machines. Whether you’re a beginner or experienced, here’s what you’ll learn:
- Start with a character you love and gather detailed references. Simpler designs, like Ash Ketchum, are great for beginners.
- Break the costume into parts - clothing, armor, props - and plan for detachable pieces for ease of transport.
- Budget wisely: Costs range from $100 to several hundred dollars depending on complexity. Test with inexpensive materials before using pricier options.
- Use the right tools and materials: EVA foam for armor, spandex for fitted suits, and thermoplastics for rigid parts.
- Perfect the fit by creating mockups with muslin or scrap foam. Test comfort and mobility before final assembly.
- Add details like paint, straps, and LED lights to bring your costume to life.
Crafting cosplay gear requires patience and practice, but the satisfaction of embodying your favorite character makes it worth the effort.
Planning Your Cosplay Project
Selecting Your Character and Gathering References
Pick a character you're genuinely excited about - your passion will keep you going when the project gets tough. If you're new to cosplay, start with characters that have simpler designs, like Ash Ketchum from Pokémon or Wednesday Addams. For those with more experience, tackling complex armor or costumes with electronics can be a rewarding challenge.
Gather detailed reference images from every possible angle. Look for official design sheets, 3D models, or movie stills, and organize them on a mood board to keep track of colors and textures. As Sarah Lee puts it, "The foundation of a successful cosplay costume lies in meticulous planning and research" [5]. Pay close attention to areas where your body moves - like elbows, knees, and the waist - to ensure the costume remains flexible. Use your measurements to sketch props and armor to scale, helping you visualize the final product.
Once you have a clear idea and solid references, break your design into smaller, manageable parts.
Dividing the Costume into Smaller Parts
Organize your costume into categories like clothing, armor, props, accessories, footwear, wigs, and makeup. Use your references to figure out how the layers interact. For example, does a breastplate go over or under shoulder armor? Decide which pieces need to be detachable for easier transport and which can be permanently attached.
Create a checklist for every detail - buttons, LEDs, paint colors, and more. This will help you track your progress and ensure nothing gets missed. For large items, like helmets or oversized weapons, plan to build them in smaller sections or 3D print parts that can be assembled later.
With everything broken down, you can start aligning your plans with your budget and schedule.
Setting Your Budget and Timeline
Focus your spending on high-quality materials for fabric, armor, and key props. Don’t forget to budget for unexpected costs like software subscriptions, shipping fees, or supplies like sandpaper and primer.
Begin planning early to spread out costs over time. Build in extra time and money for mistakes - 3D printing a helmet, for instance, can take 45 to 50 hours and might require multiple attempts [7]. Before cutting into expensive materials, test the fit and scale with cheap mockups using cardboard or scrap foam. Set a firm spending cap to avoid blowing your budget on minor details.
Careful planning will help you transform your creative ideas into stunning, wearable art.
sbb-itb-342b8b2
The EVA Foam Basics | Beginner's Cosplay Tutorial To Armor And Props
Materials and Tools You'll Need
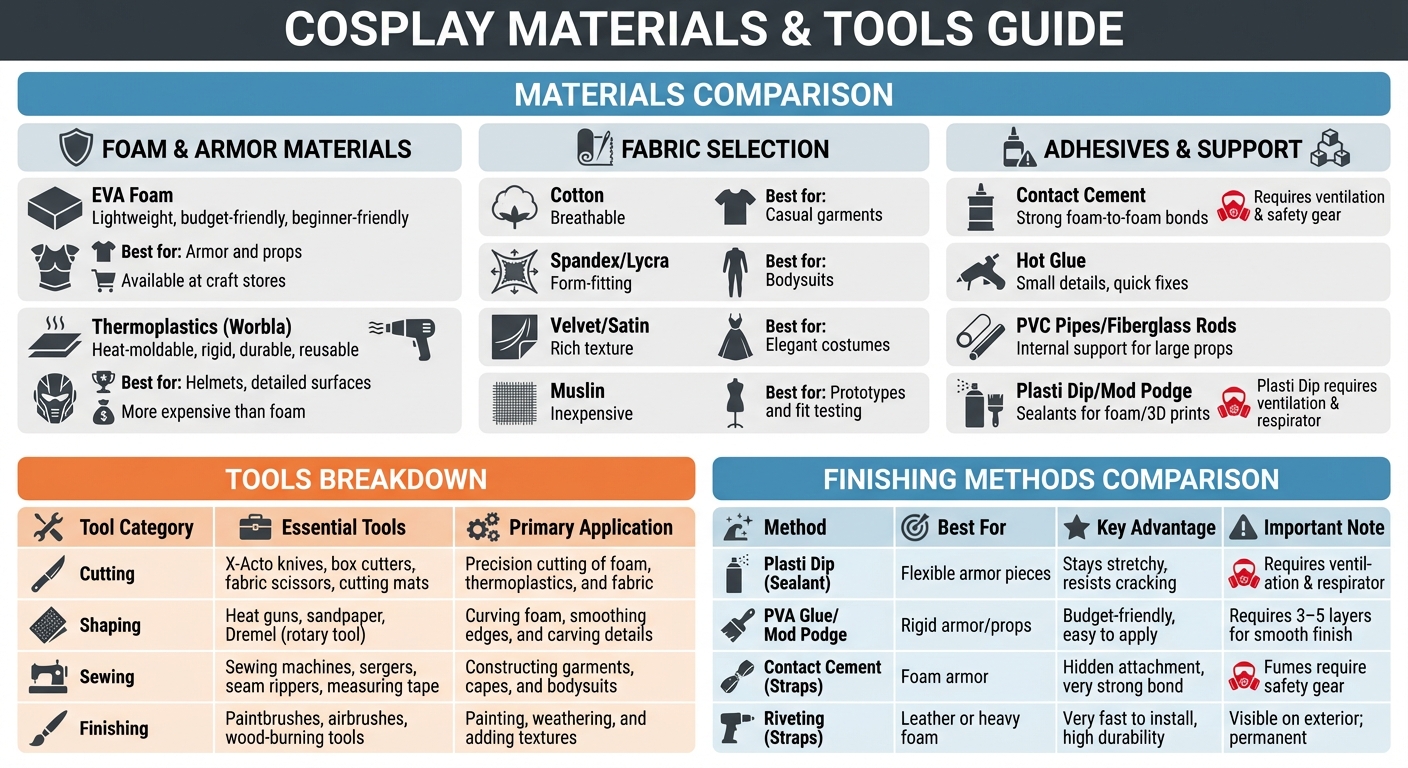
Cosplay Materials and Tools Comparison Guide
Once you've mapped out your project, the next step is gathering the right materials and tools - the backbone of any successful cosplay build. EVA foam is a favorite among cosplayers. It's lightweight, budget-friendly, and forgiving for beginners, making it an ideal choice for creating armor or props. You can find it easily at craft stores or online. For projects requiring extra strength - like helmets or detailed surface designs - thermoplastics such as Worbla are excellent. These materials can be heated and molded into rigid shapes, offering durability and flexibility. While more expensive than foam, their strength and reusability make them worth considering.
When it comes to fabric, your selection depends heavily on your character's design. Breathable fabrics like cotton work well for casual garments, while spandex or lycra is perfect for form-fitting bodysuits. For costumes that demand a touch of elegance, velvet or satin can provide a rich texture. To avoid costly mistakes, try making a prototype with muslin first. This inexpensive fabric lets you test the fit and movement before cutting into your final material.
As Sarah Lee explains, "The choice of materials can make or break your cosplay costume. Selecting the right fabrics, foams, and other materials is crucial for achieving the desired look and ensuring durability."[5]
Common Materials: Foam, Fabric, and Thermoplastics
In addition to the basics, adhesives play a big role in assembly. Contact cement is perfect for creating strong foam-to-foam bonds, while hot glue works well for smaller details and quick fixes. For larger props like swords or staffs, internal supports like PVC pipes or fiberglass rods add structure without adding too much weight. To prep foam or 3D-printed parts for painting, use sealants like Plasti Dip or Mod Podge to prevent paint absorption and improve the finish. Once your materials are sorted, the right tools will help bring your vision to life.
Required Tools: Sewing Machines, Heat Guns, and Dremels
The tools you choose are just as important as the materials. A heat gun is a must-have for shaping foam and activating adhesives like contact cement. Sharp X-Acto knives or box cutters ensure clean, precise cuts without crushing the material. For smoothing seams or adding intricate details, a Dremel or rotary tool is indispensable. If your project involves fabric, a dependable sewing machine is essential. Pair it with fabric scissors, a seam ripper, and a measuring tape for precise garment construction. When working with adhesives or spray paints, always wear a respirator and use sharp tools to ensure safety and accuracy.
| Tool Category | Essential Tools | Primary Application |
|---|---|---|
| Cutting | X-Acto knives, box cutters, fabric scissors, cutting mats | Precision cutting of foam, thermoplastics, and fabric |
| Shaping | Heat guns, sandpaper, Dremel (rotary tool) | Curving foam, smoothing edges, and carving details |
| Sewing | Sewing machines, sergers, seam rippers, measuring tape | Constructing garments, capes, and bodysuits |
| Finishing | Paintbrushes, airbrushes, wood-burning tools | Painting, weathering, and adding textures |
Construction Techniques for Cosplay Gear
Bring your favorite characters to life with techniques that turn imagination into reality. These methods help bridge the gap between fantasy designs and wearable, convention-ready pieces.
Building Props and Armor with EVA Foam
Start by creating patterns with the "Duct Tape Dummy" method. Wrap the body part you’re working on with plastic wrap and duct tape, sketch your design directly on it, and then cut it off to create a 3D template. Flatten these pieces into patterns, adding small V-shaped cuts, or "darts", to help the foam curve naturally around your body. Use a sharp utility knife for clean cuts, and for seamless joints - like those on helmets or breastplates - make 45-degree beveled cuts to create smooth mitered corners.
To shape the foam into armor, use a heat gun to soften it, then mold it over forms like PVC pipes for bracers or bowls for shoulder armor. Hold the foam in place until it cools to lock in the shape. For assembly, apply thin layers of contact cement to both surfaces, let it sit for 10–15 minutes until tacky, then press together for a strong, lasting bond. Always wear a respirator with vapor cartridges when working with contact cement to avoid inhaling harmful fumes.
Before painting, seal the foam to prepare it. First, use a heat gun to close the foam’s pores, then apply flexible coatings. Plasti Dip is ideal for pieces that need to bend, while PVA glue or Mod Podge works well for rigid props. To ensure perfect alignment during assembly, draw small hash marks, or registration marks, across seams on your patterns.
As armor expert Dexter Leonardo Enriquez puts it, "The real secret to incredible armor isn't some magic technique. It's about doing a lot of small steps really, really well." [10]
Once your armor is ready, move on to sewing garments for a complete look.
Sewing Custom Garments
Start by making a muslin prototype to test the fit and ensure smooth movement. Whether you’re draping fabric or working with flat patterns, always wash your materials beforehand to avoid any shrinkage later.
For durability that can handle crowded conventions, finish seams with techniques like serging, zigzag stitching, or binding with bias tape to prevent fraying. When working with heavy fabrics like leather or thick synthetics, hand-stitching with a "saddle stitch" (using two needles) creates stronger seams than a machine. Plan structural elements early - like boning for corsets or interfacing for stiff collars - to maintain the garment’s shape and stay true to your character’s design.
Adding Details: Paint, Straps, and LED Lights
Once the structural components are complete, focus on the finishing touches. For foam armor, start painting with a gloss black base coat. Add depth by airbrushing darker shades into crevices and dry brushing lighter metallics for highlights. To create a weathered look, use a watered-down blackwash to emphasize recessed details, then add silver scratches for battle damage and stipple brown or orange paint for rust effects.
Plan your strapping system before you start painting. Use nylon webbing for strength and elastic for flexibility, secured with side-release buckles or Velcro. Attach straps with contact cement before sealing or painting - gluing to painted surfaces weakens the bond. For comfort, install foam padding inside armor pieces to evenly distribute weight and prevent chafing during long hours of wear. If your design includes LED lights, integrate them during the final assembly, hiding the wiring within foam layers for a polished finish.
| Method | Best For | Key Advantage | Important Note |
|---|---|---|---|
| Plasti Dip (Sealant) | Flexible armor pieces | Stays stretchy, resists cracking | Requires ventilation and respirator |
| PVA Glue/Mod Podge | Rigid armor/props | Budget-friendly, easy to apply | Requires 3–5 layers for smooth finish |
| Contact Cement (Straps) | Foam armor | Hidden attachment, very strong bond | Fumes require safety gear |
| Riveting (Straps) | Leather or heavy foam | Very fast to install, high durability | Visible on exterior; permanent |
Finishing and Assembly
The final stage of creating your cosplay is where everything comes together. It’s the moment when individual pieces transform into a wearable outfit that embodies your character. To ensure everything fits and functions as intended, start by building mockups. For garments, use muslin fabric, and for armor, try scrap foam or cardboard. As Arrow Sewing advises, "Making a muslin prototype of your cosplay garment can ensure fit, comfort, function, and appearance" [4]. While cardboard is great for quickly testing shapes, scrap foam offers a closer approximation of the thickness and flexibility of EVA foam.
Before finalizing, simulate real-world movement - walking, sitting, posing - to ensure comfort and mobility. Pay attention to how your armor fits, especially around the torso. Armor that extends too far below the waist can restrict bending. Also, identify any "hot spots" where materials may dig into your skin or shift awkwardly. As Muhammad Ibrahim points out, "A good piece of armor should not restrict your movement very much if at all" [9]. Make sure joint plates at elbows, knees, and shoulders overlap properly without causing binding. These checks are crucial for achieving a well-fitted, functional costume.
Testing Fit with Mockups
Drafting accurate patterns is key, and using tape on your body or a dress form can help refine the fit. Test repeatedly, adjusting as needed to ensure precision. Move around vigorously to test the durability of straps and joints. If anything shifts or falls apart, reinforce it before moving forward. Always prepare an emergency repair kit with essentials like safety pins, adhesives, and thread for troubleshooting during this phase.
Using Laser Cutting and 3D Printing
Once you’ve perfected the fit with manual mockups, digital tools can take your design to the next level. 3D printing is ideal for creating intricate, symmetrical details that are tough to achieve by hand. A full 3D-printed costume typically uses 2 to 4 kilograms of filament, costing $20–$50 per kilogram, with an additional $50–$100 for post-processing materials [2]. Khal from Cosplay3DPrint.com explains, "3D printers can create shapes and details that are hard or impossible to make by hand" [2].
To avoid fit problems, scale digital models to match your body measurements before printing. Use TPU filament for flexible parts like straps or joints, and opt for ABS or PETG for rigid armor sections [2]. After printing, apply several thin coats of primer, sanding between layers to smooth out print lines. Laser cutting is another excellent option, especially for creating repeatable patterns and templates for fabric or foam with precision.
Putting It All Together
Before committing to adhesives, dry-fit all components to check alignment. Reinforce stress points with fabric or mesh to prevent cracking, and use nylon straps for load-bearing areas. For parts requiring flexibility, elastic straps work well. Distribute weight evenly and add padding to prevent sagging. For assembly, bond 3D-printed pieces with contact cement or screws if you need parts to be removable [2].
Finish your costume with a clear coat to protect the paint from wear and tear. Test the fully assembled outfit by wearing it for extended periods to identify balance issues or loose parts. Finally, pack a repair kit with essentials like safety pins, hot glue, contact cement, duct tape, and extra thread. This kit will be a lifesaver for quick fixes during conventions.
Conclusion
Creating custom cosplay gear brings your favorite characters to life through thoughtful planning, material selection, and reliable crafting methods. Start by breaking down your design into manageable sections and gathering high-quality reference images to guide your work[6].
Choosing materials wisely is essential. EVA foam is a go-to for beginners crafting armor, while PLA filament is ideal for intricate 3D-printed props[1][2][8]. Achieving polished results depends heavily on prototyping and finishing. Use affordable materials like muslin or scrap foam to test fit and mobility before committing to final construction[4]. For 3D-printed elements, applying filler primer and sanding between layers can smooth out imperfections, giving your project a professional edge[8].
Comfort is just as important as appearance. Incorporate foam padding and carefully plan joint placement for wearability. If you’re new to cosplay, start with a simple design to build your skills while keeping costs manageable - around $100[3][9][11][2].
As professional cosplayer Sarah Stark explains, "A custom cosplay lets you embody Jon Snow's spirit, not just his look."[11]
FAQs
How do I choose the right materials for my cosplay?
To choose the best materials for your costume, think about what your design requires and the characteristics of each option. EVA foam is a great choice for armor because it’s lightweight, budget-friendly, and can be molded easily with heat. For intricate props, PLA is a solid option, though it’s prone to warping in high temperatures. If you’re aiming for a flexible and realistic look, leather is a fantastic pick for stylized armor. Also, consider the environment where you’ll be wearing the costume - some materials handle outdoor or warm conditions better than others.
What’s the fastest way to get armor that fits well?
The fastest way to craft well-fitting cosplay armor is by using 3D printing. Start by selecting or designing a 3D model, then print the pieces using materials such as PLA, ABS, or TPU. After printing, you can assemble the parts and make any adjustments to ensure a snug fit.
Another quick option is EVA foam. This material is easy to cut, shape with heat, and assemble - perfect for those familiar with foam crafting techniques. It’s a go-to choice for many cosplayers due to its flexibility and ease of use.
Should I use EVA foam or 3D printing for props?
EVA foam is a go-to material for cosplay armor and large wearable props. Its lightweight and flexible nature make it easy to cut, shape, and layer, resulting in durable creations without breaking the bank. On the other hand, 3D printing shines when it comes to intricate designs or detailed accessories. While it involves higher setup costs and more preparation, it offers unmatched precision and customization. Many cosplayers blend these two techniques to achieve the perfect balance of durability, detail, and creativity.
Current contact path
Need Weird Network WiFi, custom apparel, or scoped help?
Use the contact form; removed product, checkout, research, and newsletter funnels stay offline.